
在眾多的北美原住民故事中,印第安人的蘇族留下了這永恆的傳說…
「好夢與惡夢迴盪在夜晚的空氣中。在圈環中編織的網,可以改變個人的夢。通過網的好夢,會進入睡眠者,而被網所纏住的惡夢,則會消失於黎明出現的第一道曙光下…」
From one of the most beautiful stories in American Indian Mythology, Sioux Nation believed the following…
“It is said that both good dreams and bad dreams circulate in the night air. The loop, its centre woven in a web-like pattern, allows the good dreams to pass through the web into the sleeper, but makes bad dreams become entangled in the web, where they perish at the first light of dawn.”
這故事的另一種版本是:
「惡夢會穿越網間的洞,飛到窗外去,好夢則會被留在網上,順著羽毛滑下進入睡眠者。」
Another variation of the story is:
“Nightmares pass through the holes and out of the window. The good dreams are trapped in the web, and then slide down the feathers to the sleeping person.”
不管是哪個故事版本,結果都保證入睡的人會有個好夢。
Regardless of the version of the story, the result guarantees the sleeper would have a sweet dream at night.
圈環中編織的網,就是捕夢網,英文為:Dream Catcher. 通常用柳枝來做框,中間編織著網,再用私人或神聖的物件來裝飾它 (例如:羽毛或串珠)。
The loop with centre woven web-like is known as "Dream Catcher" today. Usually handmade with willow hoop and a woven web in the centre. It is is then decorated with personal and sacred items such as feathers and beads.

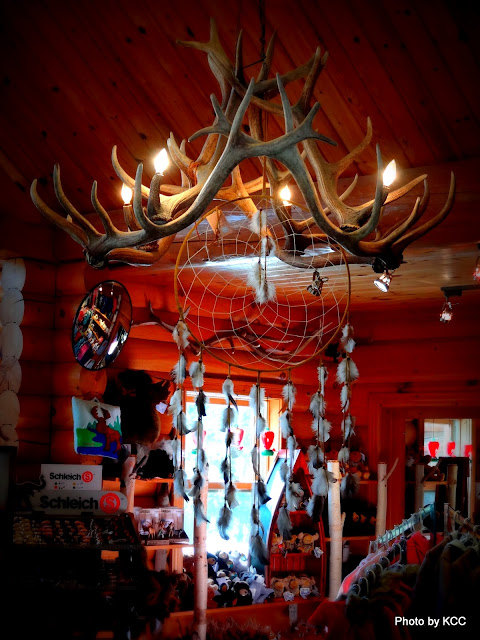
捕夢網在北美的紀念品店,有時候會看的到。種類有大有小,網的編織方式和裝飾的花樣非常多變化。Handmade Dream Catcher sometimes can be seen in North American souvenir shops. It is crafted in many variations in terms of the different woven web patterns and decorations.
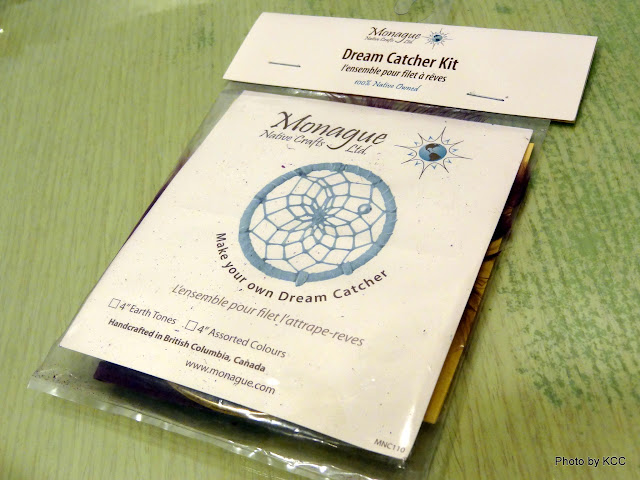 去年年底到黃刀鎮看極光時,特別帶回來一樣「非成品」的紀念品:捕夢網DIY製作的材料。When I went to Aurora viewing in Yellowknife last year, I bought a dream catcher making kit.
感覺手工藝品的紀念品,能親手自己做的話,成就感也最大,如果要送人時能代表的心意也最足。它適合毫無經驗,但有心製作手工藝品的每個人。
For the handmade craft like Dream Catcher, I felt that if we could be in the process of making one, you will have a greater sense of accomplishment. It could potentially be a good gift as well. This DIY kit is for everyone who’s hasn’t done it before but interested in making your own craft. There is no prior experience is required~
 材料包打開後,裡面有:
Within the kit, it contains:
- 鐵環 Ring
- 皮革條Hide Strip
- 皮革帶Hide Tie
- 線 Thread
- 大的有孔珠 Large Silver Beads
- 有孔小珠 Small Silver Beads
- 羽毛 Feathers
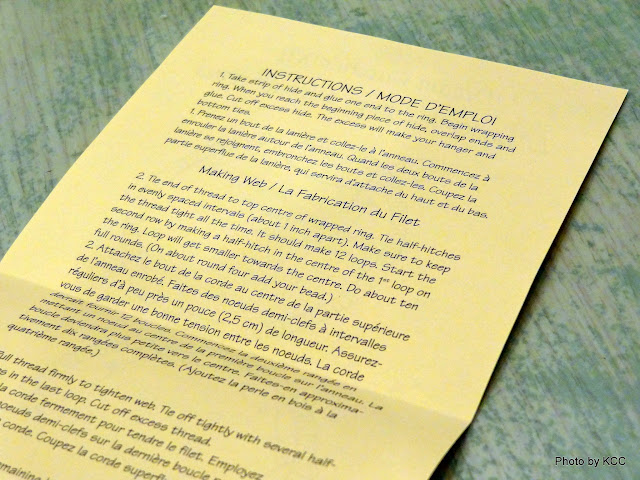
- 還包含一張有英文和法文的捕夢網手工製作說明書。 There is an bilingual instruction sheet in both English and French.
捕夢網手工製作步驟一:捕夢網的外環
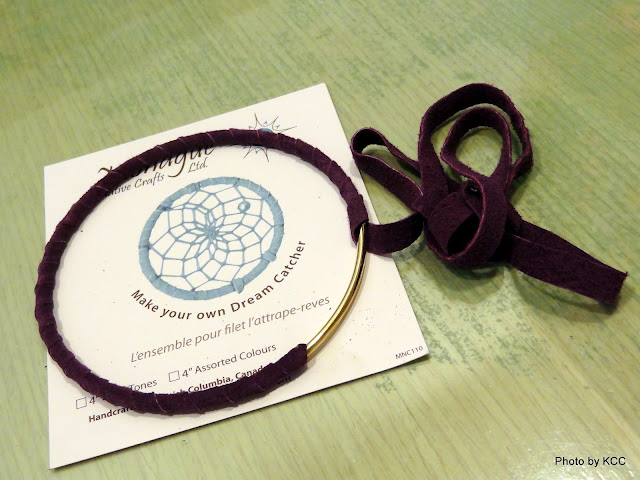
把皮革條的一端黏在鐵環上,然後開始將它捲繞於鐵環上。環繞一圈後,少許覆蓋著開頭部分用膠黏上,並把多餘的皮革條剪去,之後可以用來做吊帶和地下的裝飾條。
小提醒:在用皮革條卷繞鐵環時,記得要把露出鐵環空隙的空間小心補上,所以當皮革條完成環繞鐵環一整圈時,是完全將鐵環包覆其中的。

Step 1: The Ring
Take strip of hide and glue one end to the ring. Begin wrapping ring. When you reach the beginning piece of hide, overlap ends and glue. Cut off excess hide. The excess will make your hanger and bottom ties.
 外環被皮革條包覆住完成的樣子。The completed ring with the wrapping hide.
捕夢網手工製作步驟二:捕夢網的編織
這個步驟主要是用附上的細線在鐵環內結網。
外圈環節點 Outer Hitches

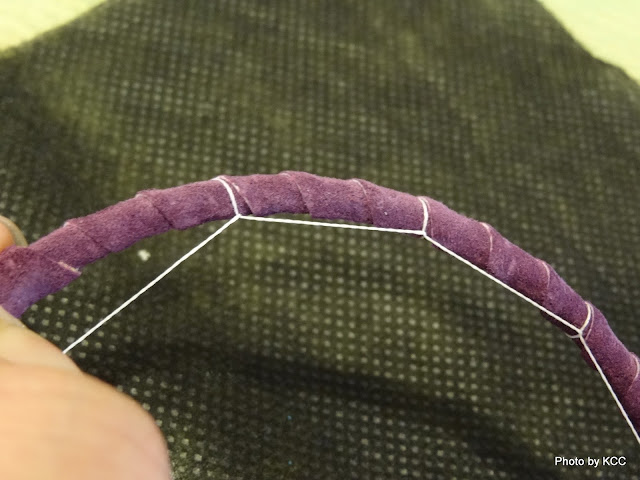
從說明書正面的圖示可以看到,細線須先在環上打個結固定,線拉緊後,每隔一吋 (2.54 cm) 在鐵環上再打一個環節。完成後外圈會有 12 個環節點。
小提醒:剛開始用線在鐵環上固定捕夢網最外圈位置時,有時會很難掌握每個環節之間所需要的空間。這時可利用皮革條環繞鐵環的圈數來當作一個參考點。在當時製作時,這裡也花了一段時間摸索,最後才決定每隔 3 個皮革條環帶,用線打一個環節固定。雖然說明書是說每隔一吋打一個環節,不過還是可以根據自己的需求,平均的分配外圈環節點的位置。
內圈環節 Inner Hitches


從第二圈開始,線的結法會與外圈不同。當完成外圈環節後,每個節點間都是被線直連起來,第二圈開始的結法,就是把線,在前一圈節點間的直線中,套個環穿繞過去。這個相同的捕夢網內圈結法,將會持續到網的最中心。

當越接近內圈時難度越高,圈也會越小。附上的細線可以完成約 10 個內圈。在約第 4 圈開始時,可以把有孔小珠節在線上。

Step 2: Making the Web

Tie end of thread to top centre of wrapped ring. Tie half-hitches in evenly spaced intervals (about 1 inch apart). Make sure to keep the thread tight all the time. It should make 12 loops.
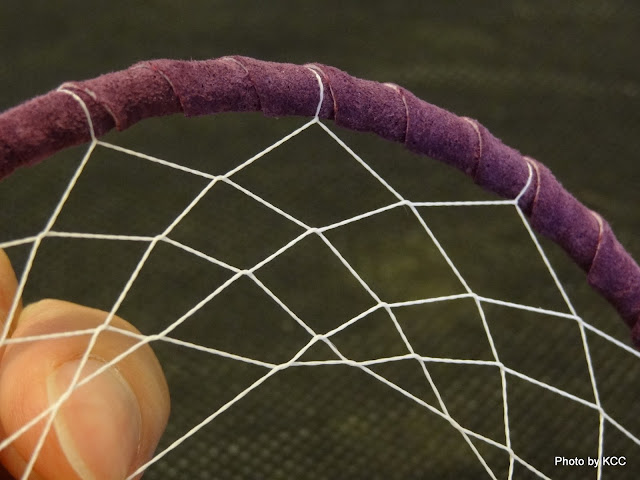
Start the second row by making a half-hitch in the centre of the 1st loop on the ring. Loop will get smaller towards the centre. Do about ten full rounds. (On about round four add your bead)

從照片可以看到,編織捕夢網內圈是道繁瑣的工藝,時時要注意線的緊度、網形、和內圈的數量。編到很內圈時,由於線與線的網狀空間越來越窄小,要把線從前一圈節點間穿繞過去,變成是個很困難的工程。
Making the Dream Catcher web requires attention on the tension of the thread, shape of the web and constantly tracking the number of loops. As you weaving towards the centre of the web, the working space becomes very limited, and to make half-hitches between these tiny holes were the tests on your patience and determination.

遇到窄小的網狀空間,可以建議用手小力的拉開節點,再把細線彎曲後,以線彎曲的部分套進拉開的節點空間。
When it comes to weaving the half-hitch on the tiny web, it is suggested to pull the thread of the target location to make the extra space for the main thread, then bend the thread, have the bent thread "slip" through the hole.
捕夢網手工製作步驟三: 捕夢網的收尾
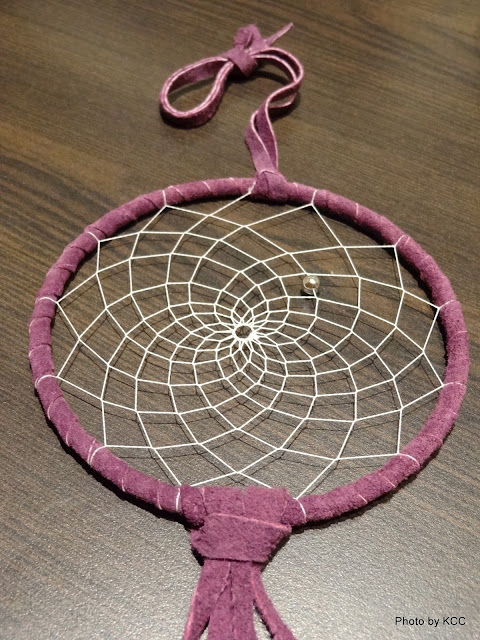
說明書上的收尾的方法,是將網拉緊,在網中心打數個結點後,剪掉多餘的線來完成捕夢網的編織動作。但這個方法會造成網中心的線糾結在一起。在當時個人的偏好是留下內側的中心圓,產生讓內網和外環有對稱的視覺效果。這樣收尾的選擇,提供給大家參考。

Step 3: Finishing the Web
Pull thread firmly to tighten web. Tie off tightly with several half-hitches in the last loop. Cut off excess thread. This method will normally cause the centre of the Web to form a small bulb. Alternatively, I prefer leave the inner circle of the Web alone, so it is visually symmetrical to the outer ring of the dream catcher. This is yet another variation for your reference.
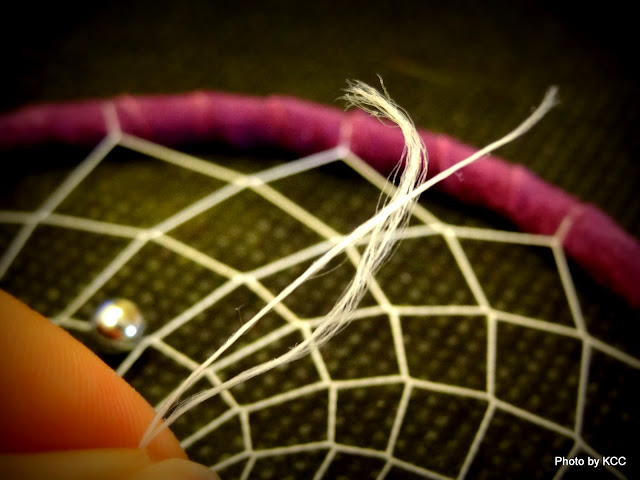 當時再開始收尾時,遇到線本身分叉的狀況。
When I was about to finish the Web, the thread’s condition deteriorated and began to split.
 也利用了別針來幫忙穿針引線… (建議有老花眼症狀的話別輕易嘗試…XD)
A pin was used to help guide the thread into the tiny holes in the inner loop of the Web.

這是編織內網收尾後的樣子。
This is the core of Dream Catcher when Web weaving task has completed.
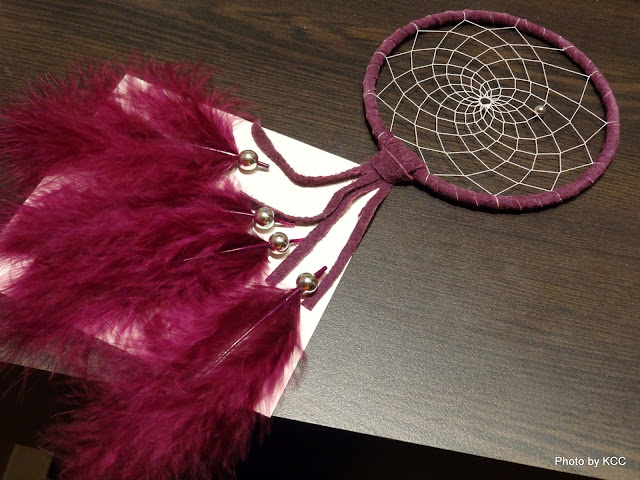
捕夢網手工製作步驟四: 捕夢網的底部裝飾
將剩下的皮革條在外環底部打一個 lark’s head (Cow hitch) 結,再把兩段皮革條各剪一刀,就變成四段皮革條。這時把大的有孔珠繫在羽毛上方,之後再一起黏到皮革條底部。
Step 4: Decoration at Bottom
Take some of remaining hide and make a lark’s head knot at the bottom of the Dream Catcher. Cut the strips in two leaving you four ties. Put two (one) bead (s) per tie then glue in feathers.
捕夢網手工製作步驟五: 捕夢網的吊繩製作
做到這個步驟時,已經接近捕夢網手工製作的尾聲,可以去沖杯熱水、泡杯咖啡或點首歌來慰勞自己的辛苦。等水滾的時間可以用來完成最後這個程序:把皮革帶在外環上方打一個與底部相同的結,再打一個方便吊掛用的圈結,就完工了~
Step 5: Making the Hanger
Take remaining hide and tie at top of Dream Catcher for hanger.
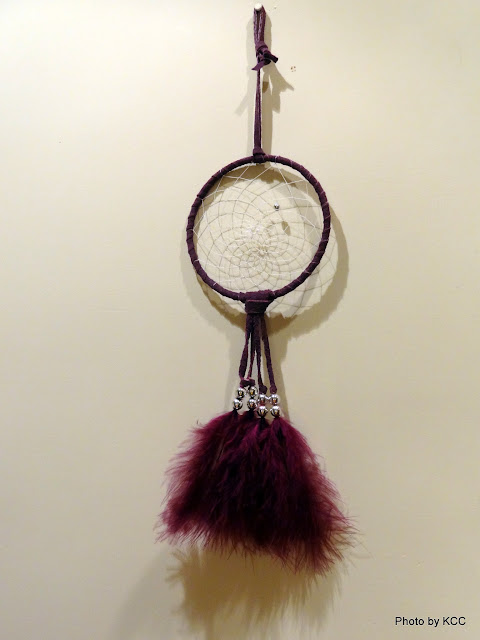
自製捕夢網是不是很簡單/困難呢?完成後的捕夢網可以掛在床頭上方,給自己帶來好夢。有興趣自己 DIY 的人可以嘗試~
Has it been easy / difficult? The resulting Dream Catcher can be hung above the bed, and used as a charm to protect sleeping person from nightmares. Wouldn’t you want to give it a try?
Source of Information
The instructions and information above for making your own dream catcher is based on the DIY kit product instruction manual from Monague Native Crafts


Quiet interesting sharing, I do have one which I bought 12 years ago and I still keep it as decoration in my room
By: Kodak on 1 一月, 2013
at 8:48 下午
羨慕啊 能自己動手不論自用或是送人都非常有意義
By: 呂渼榛 on 2 三月, 2013
at 3:47 上午
謝謝你~有些東西自己動手做的確會再添加些成就感,有機會可以試試。:)
By: Joyful Element on 10 三月, 2013
at 10:28 上午
去哪里买材料
By: 匿名 on 27 二月, 2015
at 4:12 上午
请问材料哪里买得到啊?我也想自己做一个~ ><
By: abby on 2 一月, 2014
at 11:30 下午
我想請問材料哪裡可以買
要怎麼拉的這麼漂亮
我主要想問您的收尾方法怎麼弄成一個圓
還有打結嗎?因為我看不太懂,我自己打的結會容易跑出來
您有在幫別人製作嗎?
因為老師說我們做的不精緻
請別人幫我們做比較快
By: elaine on 10 十二月, 2014
at 1:55 上午
不好意思,網友大家問在哪裡可以買到的這問題,我也一直無法找到很好的答案。
上面所介紹的是 Monague 捕夢網DIY Kit 包,旅遊回來後自己也找了一陣子,但沒找到,只能說可遇不可求。因為要找到代理這捕夢網品牌的店家不容易,除了之前在加拿大的黃刀鎮上見到過,之後也在也沒機會買的到。不過上網找的話,有其他品牌的產品可以從本身的網頁或線上的亞馬遜 (Amazon.com) 訂購。有興趣的朋友可以試試囉。
最後收尾的部分 我記得捕夢網內圈結法到最後是會讓中間的空間越來越小,形狀也越來越圓。最後是用別針輔助把線拉緊後打小結,在修剪掉多餘的線材。如果線材夠多,那可以把結打在正中間。只是當初我想讓內網和外環有對稱輔助的視覺效果,而選擇做這樣的小圓當收尾。
也謝謝妳的詢問,上面介紹的過程也是我第一次的捕夢網 DIY 製作,完全是業餘的囉。不知道原來也有老師在教這工藝,真不錯 : )
By: Joyful Element on 11 十二月, 2014
at 12:20 上午
在哪裡可以買到啊~
By: Juliana[燕妮] on 17 一月, 2014
at 11:36 上午
><?
By: 黃智伶 on 21 十月, 2014
at 4:51 上午